

Welcome to what is hopefully the first of many fabulous, FREE tutorials from many talented guest artists. There is such a vast wealth of diverse creativity and talent in blogland! It makes for wonderful eye candy, but all the better to actually learn from the artisans.
My first featured guest is the lovely Mrs. A., of
It's An Alien Life.
Mrs. A. is a seamstress, quilter, paper artist, all around crafter and fellow swapper. She's graciously offered this fabulous tutorial to kick off Tutorial Tuesday:
Netbook Cover Tutorial
My daughter asked me to make her a cover for her new netbook. Having looked around the Web and not seeing anything suitable I decided to design one myself. It was really easy to make so thought I would also write a tutorial as I went along.
1. First thing is to take measurements and add a 1" seam allowance (this will be trimmed back at a later stage). The measurements here are 10" x 7.1/2" with a depth of 1.1/2" at back of book.

2. Next choose your materials. Felt is very soft and doesn't fray so is very suitable. I also used a soft woollen mixture (again choose a non fraying material) for the lining and quilt wadding for the padding. All stitching will be done on the right side.

3. My daughter wanted a flower embellishment with buttons for the centres so using felt I cut several flowers and mixed and matched colours.

4. Make a paper template up of the size required and cut two lining pieces. Next cut two wadding layers but cut 1/2" smaller all round.

5. Stitch wadding to wrong side of lining using a zig zag stitch on your machine.
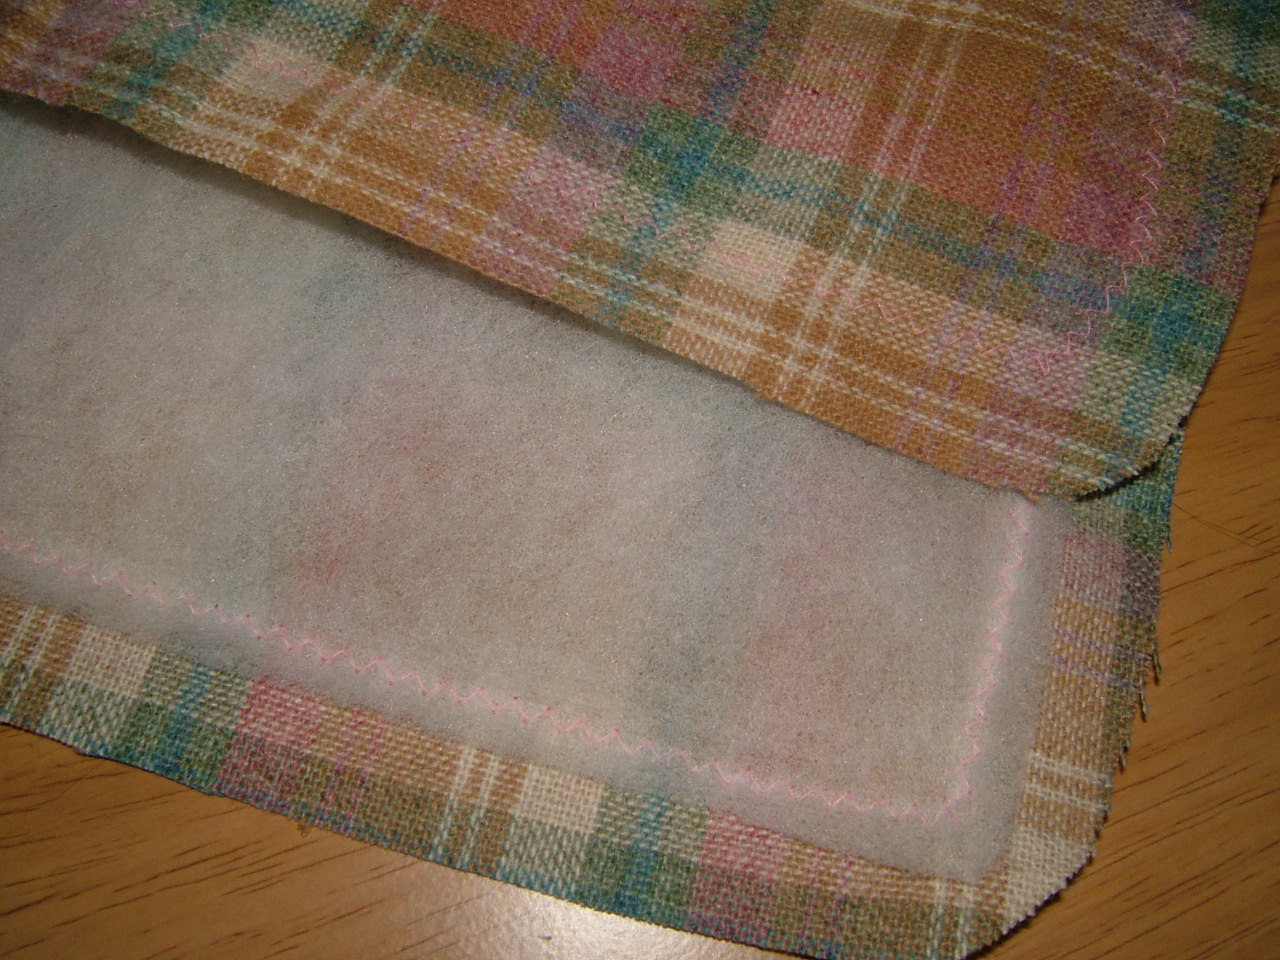
6 Cut 2 felt (top cover) pieces and stitch to wadding side of lining.

7. Measure around one long and two short sides of the cover and cut a strip of lining material using the depth measurement making sure that it extends each end by at least 2" (This can be trimmed to fit later).

8. Cut an identical strip in the felt (outside cover) and tack these two strips together.

9. For the zip opening measure top of bag and extend measurement to go 2" either side. Here the opening is 10" so I have used a 14" zip which will wrap around the sides. (By using a zip that is larger it will be easier to get the netbook in and out of the case.)

10. Cut a strip in felt the length of the zip and the same width as the gusset above then cut in half lengthwise. Using a zipper foot on your sewing machine and stitching as close as possible attach a strip to each side of the zip.

11. Tack and stitch the zipper to the top of the bag opening and wrap down the two sides.

12. Now pin and tack the gusset to the remaining three sides extending to cover the zip ending by 1/2" Trim off the excess material. Pin and tack to other side of zip to form a bag shape.

13. Stitch round both front and back.

14. Bag should now look like this. As felt has been used there is no need to turn the bag inside out. All the stitching has been done on the right side.

15. Using pinking shears trim away the excess material to leave a neat edging all the way round. Attach flower embellishments to front of cover.

16. You now have a neat, durable and very soft cover for a netbook. I hope this tutorial will inspire you to make one for yourself.

Please visit Mrs. A. and let her know how much you enjoyed her tutorial. I hope you'll plan an extended visit allowing yourself the time to see everything she's been up to! She also has a GIVEAWAY you can enter for a chance to own one of her beautiful brooches.
I would like to thank Mrs. A. for stepping up so quickly with such a detailed and enjoyable tutorial.
Don't be shy, share one of your projects with your fellow bloggers! Let's make 2011 the year of sharing knowledge and talent. What may seem like the easiest thing in the world to you is something somebody, somewhere, wishes they could learn. Getting involved is easy-just scroll to the post below or click HERE for details.


TABBYSPLACE.png)


8 comments:
How darling is that!!! Thank you for sharing, so nice to see something and how it is made......
Hugs,
Margaret B
Wonderful and thanks to the great photos and tutorial . Even I could make that ...thank you for sharing and thank Jo Ann for hosting Hugs wendy
Fantastic tutorial - I've been a fan of Mrs A for some time, her work is always brilliant!
I look forward to seeing lots more lovely tutorials!
what a clear and fantastic tutorial....I'm a great fan of Mrs. A.!
xxx Margreet
Many thanks JoAnne for choosing to showcase my Tutorial. I feel very honoured to be the 1st one. As a companian to this post I am doing a giveaway of some felt brooches that I have made. There will be 5 lucky winners randomly choosen when it closes on Sunday 9th Jan.
Too cute. Wonderful start to Tutorial Tuesdays!
I love this-how sweet and pretty and one of a kind-very cool!
AMEI PARABÉNS SEU BLOG É LINDO, VOU LINKAR NO MEU...BJKAS
Post a Comment