Sunday, January 16, 2011

Send In The Clowns, The Paper Doll Parade Marches On

13 of these guys, for a circus themed collaborative in my Altered Art Fat Books group! We each contribute 13 INTERACTIVE 6x6 pages.

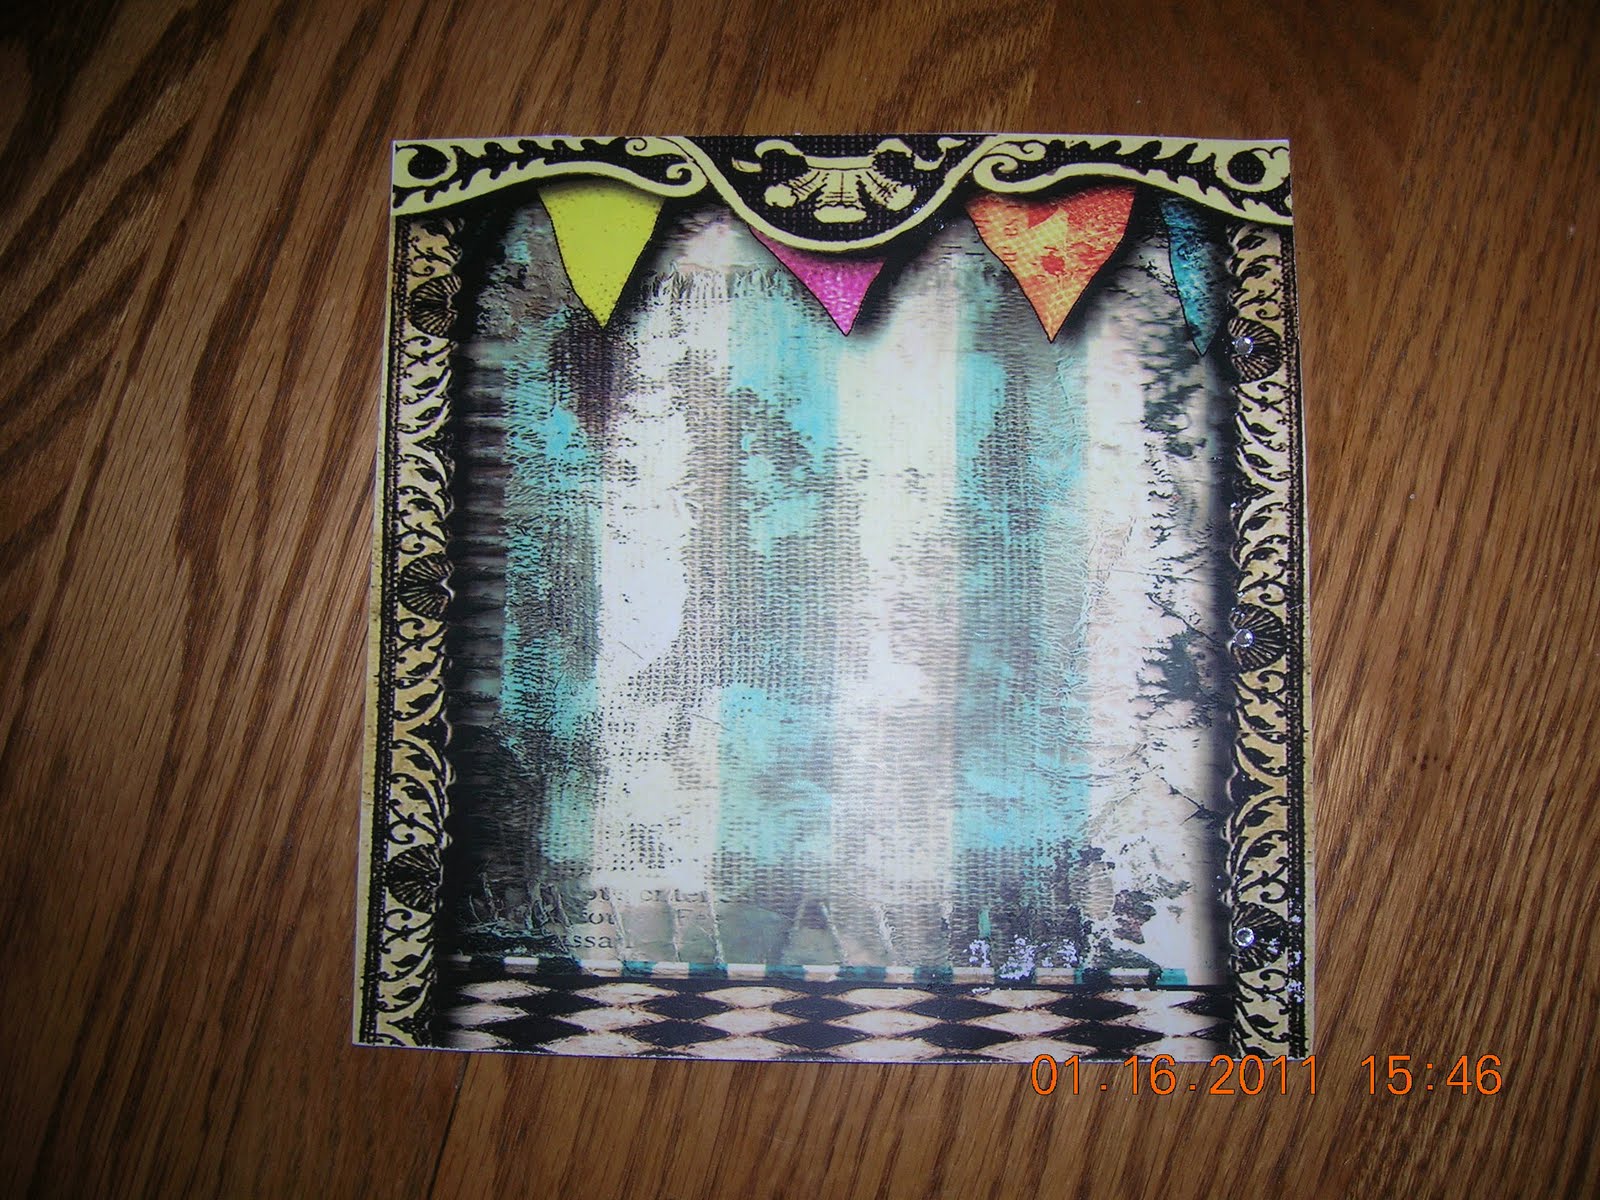
This is my background
with a little bling on the right hand border

This is the back of my pageskind of a fun, quirky image

I made the the clown dolls by scanning a page from an old (1978) Dover publication, "Antique French Jumping Jacks: 11 Easy to Assemble Toys That Move". (The book is in mint condition, picked it up an estate sale for $1.) After cutting all the pieces, I assembled with brads and used mini red pom poms to accentuate.
Each is mounted to the page (slightly off center to accomodate for the binding coils on the left) with pop-up foam adhesive squares.
The legs and arms are articulated so the clown can REALLY clown around. I can't wait to see what the other 12 come up with!

Saturday, January 15, 2011

Ms. Snow Flake

Still feeling kind of wintry (hard not to with temps in the teens and a foot of snow) so I thought the snowflake themed ATC-paperdoll swap in my Fantastic Flat Paper Dolls yahoo group was a perfect pick.I used Paper Whimsy images to construct Ms. Flake's head, skirt and feet.
Her trunk is made of layered snowflake and paper flower embellishments topped with a pearl center. I gave her mini snowflake garland arms and dresden angel wings. She wears a sheer snowflake ribbon and jeweled snowflake embellishment in her hair. She's articulated, using brads, so she can fold onto the standard size atc on which she's mounted. A few touches of glimmer and sparkle-and this girl is ready to travel.
Our swap partners will be assigned tomorrow so I don't know where she's going, but I can't wait to see who I get in return. I'll be sure to share when she arrives.

Tuesday, January 11, 2011

Bottlecap Play at Tutorial Tuesday

It's time for Tutorial Tuesday! Daniele, of
The Musings of a Chocoholic
has provided us with a really great, little tutorial. It's for a bottle cap embellishment and the reason I like this one so much is that it's pretty simple but the result is a very unique embellishment. It can be used as an accent in an altered art project, assemblage art, any mixed media project, a scrapbook or card embellishment, or even jewelry.
Daniele is always tackling and sharing new techniques, which is why I'm a frequent visitor to her blog. Here is her Bottle Cap Tutorial.
1. Materials used: image, bottle cap, alchohol ink, glossy accents, glue stick, foil and punch.
2. Use the back of the bottle cap and cut out image using a 1" punch.
3. Put glossy accents around the rim of the bottle cap.
4. Add a drop or 2 of alchohol ink, I've used rust.
5. Using glue stick, add glue and rub on foil, tearing off foil to get a more distressed look.
6. Stick image to centre of bottle cap using glossy accents.
7. Apply glossy accents to top of image covering all of image, and then leave to dry (1 hour).
8. Apply foil to the edge of the bottle cap as per instructions in point 5.
I told you this is a great tutorial-and something we all can easily play around with. And look what she did with it!
Be sure to visit The Musings of a Chocoholic where you'll find another mini tutorial for making the card! Thank you so much Daniele.
What's next? You tell me! With 273 friends (thank you!) following, we should be in tutorials for a long, long time. Are you next?

Thursday, January 6, 2011

Pretty Paper Purses

I love Anna'a blog, Frosted Petunia's , and inspired by her Artful Bag Challenge, decided to give paper purse making a try. I found a template at Stampin' Pretty (scroll about halfway down post). I'm still in a wintry mood and still loving snowflakes, so What's so sweet is the purse, minus the handle is approximately 3"x3"-perfect for party favors or table place settings. I used an embossed winter cardstock and embellished with paper lace, a little bling, paper flower and glittered snowflake.
Here's how I trimmed the handle.
Stop by Frosted Petunia's to see other pretty paper purses or post your own pretty paper purse!

Tuesday, January 4, 2011

The Premiere of Tutorial Tuesday


Welcome to what is hopefully the first of many fabulous, FREE tutorials from many talented guest artists. There is such a vast wealth of diverse creativity and talent in blogland! It makes for wonderful eye candy, but all the better to actually learn from the artisans.
My first featured guest is the lovely Mrs. A., of
It's An Alien Life.
Mrs. A. is a seamstress, quilter, paper artist, all around crafter and fellow swapper. She's graciously offered this fabulous tutorial to kick off Tutorial Tuesday:
Netbook Cover Tutorial
My daughter asked me to make her a cover for her new netbook. Having looked around the Web and not seeing anything suitable I decided to design one myself. It was really easy to make so thought I would also write a tutorial as I went along.
1. First thing is to take measurements and add a 1" seam allowance (this will be trimmed back at a later stage). The measurements here are 10" x 7.1/2" with a depth of 1.1/2" at back of book.
2. Next choose your materials. Felt is very soft and doesn't fray so is very suitable. I also used a soft woollen mixture (again choose a non fraying material) for the lining and quilt wadding for the padding. All stitching will be done on the right side.
3. My daughter wanted a flower embellishment with buttons for the centres so using felt I cut several flowers and mixed and matched colours.
4. Make a paper template up of the size required and cut two lining pieces. Next cut two wadding layers but cut 1/2" smaller all round.
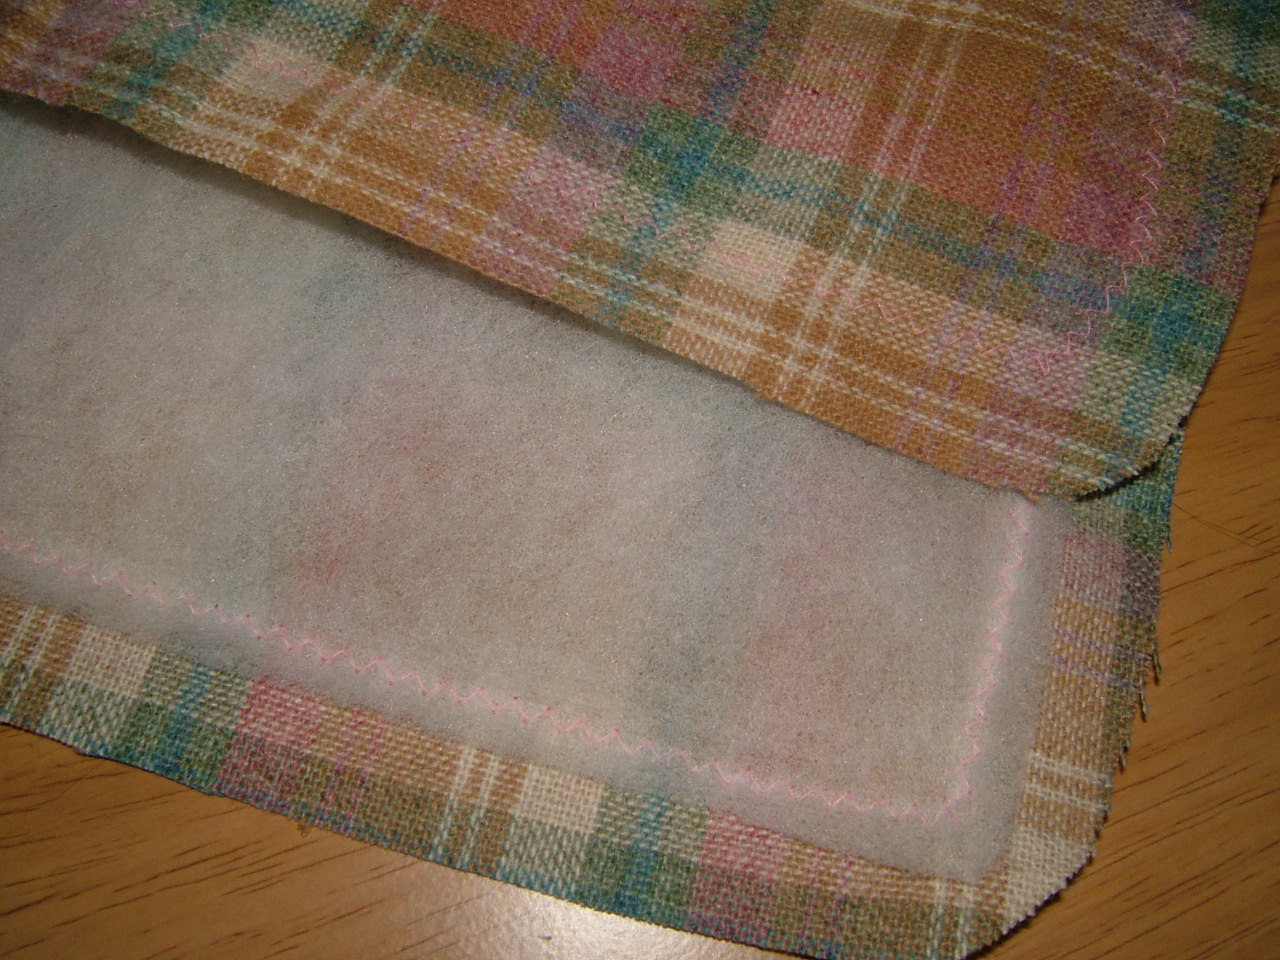
5. Stitch wadding to wrong side of lining using a zig zag stitch on your machine.
6 Cut 2 felt (top cover) pieces and stitch to wadding side of lining.
7. Measure around one long and two short sides of the cover and cut a strip of lining material using the depth measurement making sure that it extends each end by at least 2" (This can be trimmed to fit later).
8. Cut an identical strip in the felt (outside cover) and tack these two strips together.
9. For the zip opening measure top of bag and extend measurement to go 2" either side. Here the opening is 10" so I have used a 14" zip which will wrap around the sides. (By using a zip that is larger it will be easier to get the netbook in and out of the case.)
10. Cut a strip in felt the length of the zip and the same width as the gusset above then cut in half lengthwise. Using a zipper foot on your sewing machine and stitching as close as possible attach a strip to each side of the zip.
11. Tack and stitch the zipper to the top of the bag opening and wrap down the two sides.
12. Now pin and tack the gusset to the remaining three sides extending to cover the zip ending by 1/2" Trim off the excess material. Pin and tack to other side of zip to form a bag shape.
13. Stitch round both front and back.
14. Bag should now look like this. As felt has been used there is no need to turn the bag inside out. All the stitching has been done on the right side.
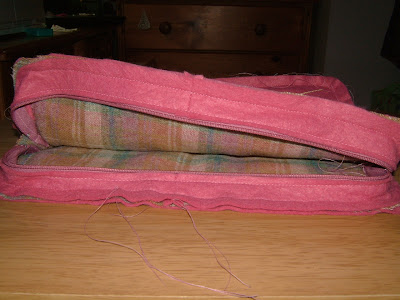
15. Using pinking shears trim away the excess material to leave a neat edging all the way round. Attach flower embellishments to front of cover.
16. You now have a neat, durable and very soft cover for a netbook. I hope this tutorial will inspire you to make one for yourself.

Please visit Mrs. A. and let her know how much you enjoyed her tutorial. I hope you'll plan an extended visit allowing yourself the time to see everything she's been up to! She also has a GIVEAWAY you can enter for a chance to own one of her beautiful brooches.
I would like to thank Mrs. A. for stepping up so quickly with such a detailed and enjoyable tutorial.
Don't be shy, share one of your projects with your fellow bloggers! Let's make 2011 the year of sharing knowledge and talent. What may seem like the easiest thing in the world to you is something somebody, somewhere, wishes they could learn. Getting involved is easy-just scroll to the post below or click HERE for details.

Friday, December 31, 2010

A New Year Means You Can Teach an Old Dog New Tricks

When my parents used to say things like "time goes by so fast" and "where does the time go?", I used to wonder what they were talking about. Now as I LIVE and FEEL every word, my college-aged daughter has that same look upon her face as I lament over the fleeting days.
In keeping with the old adage that there is no time like the present, I decided to try something new for 2011. I'd like to experiment with new techniques, explore new mediums, stretch outside my comfort zone - and I'm hoping you'll join me in this quest.
How many times have you looked at some wonderful creation on a blog and wished you could make something like that? The truth is we could all make that something with a little shared knowledge.
And with that thought in mind, Tutorial Tuesday is born.
I envision this as an avenue for not only sharing our ideas and talents, but for creating new friendships. It's also a great venue for sharing your blog with a whole new audience!
Here's how it will work:
Email me with a brief, concise tutorial of ANYTHING! It could be paper, mixed media, collage, fabric, jewelry, graphics, a recipe - anything!
Remember, what may seem very simple and basic to you, is brand new and unknown to someone else.
Include photos of the work in progress and finished project.
We can do this a couple of different ways: you can post the actual tutorial on your blog and I'll provide the link, OR
I can post the tutorial, still with a link to you.
I hope you're all enthusiastic about sharing your talents and being a part of Tutorial Tuesday. I look forward to being your host!
Please help spread the word by displaying the Tutotial Tuesday button on your blog. It can be found at the top of the sidebar. I've received questions in the past on how to link buttons that aren't html coded. So here's the first mini-tutorial! These instructions are for blogger.
1. Right click on the button and save to your computer.
2. In the design section of your blog, click on "add a gadget".
3. A window will open with options; scroll to and click on "picture".
4. A "Configure image" window will open. Click on "browse images" from your computer and upload the saved image (button).
5. In this same window there is a field for linking. In that field you can either copy and paste the name of the blog you are linking the image to, or type it in manually. In this instance it would be http://vintagedragonfly.blogspot.com.

Hide not your talents. They for use were made. What's a sundial in the shade?-Benjamin Franklin


Happy 2011 My Dear Friends!

Saturday, December 25, 2010

Let us keep Christmas,

holding it close to our hearts,

for it's meaning never ends

and it's spirit is the warmth and joy

of remembering friends.


Merry Christmas and every happiness in the New Year.
xoxo
JoAnne

Friday, December 24, 2010

...and a Partridge in a Pear Tree

Look how festive day 23's box is from Amy, of
PaperTrails

Christmas Eve and the box from Angela, of
Pages By The Sea
couldn't be more perfect! It's vintage charm...and that Santa Key stole my heart.

Speaking of heart stealing, Christmas Day's box from Becky, of
Don't Look Back
had this precious hand knit mitten inside!
Many thanks to Amy, Angela and Becky for wrapping up this countdown so beautifully.
And HUGE holiday hugs go out to our wonderful swap hostess, Linda, of
A Swap for All Seasons.
Linda had 75 of us, each making 25 matchboxes and gifts, and had them packaged and swapped out to all, with time to spare before our December 1 countdown began.

Wednesday, December 22, 2010

More Vintage Freebies & Days 20, 21, 22

Santa has some more sweet treats for me!

He brought this little gingerbread boy and house on day 20 from Becky, of
Patchwork Posse

And on day 21, this cutely decorated box from Genie, of
Buttons For Baga

Amanda, of
Whispering Christmas Dreams
asked the jolly old elf to leave this lace trimmed, sugared, tinseled parcel on day 22.

All wonderful gifts! Thank you Becky, Genie, Amanda and Santa!

Christmas Greetings to all!
I'm linked to All Things Merry & Bright at
All Things Heart and Home.

Sunday, December 19, 2010

Christmas Cheer Freebie as The Countdown Winds Down

Let's play catch-up on the last few days of matchboxes.
This gingerbread cutie on day 16 is from Shannon, of
Quilting in Pinks, Bulldogs at My Side

Day 17 brought this creative toy train box, complete with holiday earrings from Denise, of
Christ is the Heart of Christmas

A sweet angel flew in on day 18 from Patty, of Blooming in Kansas

Michelle, of Faerie Dust Dreams
created this charming vintage box and bottlecap magnet.

Thank you all for these wonderful additions to the countdown!

And as promised, a bit of Christmas cheer... Enjoy!