I call them, "Journal Jackets." They are actually book covers, or jackets. You can use them to cover one of the
Twilight books you are reading in order to avoid the weird looks by coworkers in the break room. Or, you can actually cover that journal you bought for $3.00 because it has a picture of a too cute cuddly kitten on the front. Whatever you decide to cover, here is my quick tutorial for making your very own "Journal Jacket."
NecessitiesOutside fabric (the main cover); I used a decorator weight patterned piece.
Rectangular fabric scrap for "title." I used an off-white silk-like fabric because it seems to distort the stamps/fabric ink the least. NOTE: The fabric really isn't silk, but I'm not sure what it is exactly. I will refer to it as "silk" throughout the tutorial.
Fabric scraps for the image transfers.
Sewing machine and coordinating thread
Gel medium and other image transfer supplies, including images
A book or journal to cover
MeasurementsFirst, you'll have to do some measuring. Just between you and me, I suck at taking measurements. Yes, it's true, even though my first love is sewing, I am TERRIBLE with my ruler! So, I tend to eyeball things a lot. For your journal jacket, however, just set your open book on a piece of paper and draw around it with a pencil. Now, you'll just need to add enough to each side to make the inside flaps, which holds the fabric onto the book. You'll also have to add enough to the length (and width) for the seam allowance. I use about a half an inch all around for the seam allowance. I added about 3 inches (total, including for the seam allowance) for each inside flap and about 1 inch at the top and bottom. Remember, you want to be able to get your journal inside the cover, but you also want the cover snug enough to hold the book.
NOTE: If the book you are covering has a paper jacket, use it to begin your measurements..just add a couple inches to the width for the flaps and seam allowances. Don't forget to add an inch or so for the length, too.
 |
| I usually give myself a little more wiggle room. |
Image Transfers Now that I have a pretty good idea the total size of the jacket, I can "close" it and figure out how much space I will have to embellish the front cover. For this particular jacket, I decided to use three of my favorite vintage photos. I gathered my image transfer stuff and got busy.
I'm still a beginner at this image transfer process so I've been experimenting with different methods. I've found the most success using transparencies. For this project, I printed the three images onto one full sheet of clear mailing labels. Sidenote: transparencies are expensive. I've tried to get as many images onto one sheet as possible in order to not waste an entire sheet for one photo.
Okay, back to the tutorial. Cut out each image and transfer to scraps of off white silk fabric.
Allow the transfers to dry completely. Next, I decided to jazz up the images by hand coloring or enhancing them with fabric markers and pastels. Adding color to the black and white images reminds me of vintage photos that have been hand colored. I really love the look!
If you don't want to color the images, don't! There really aren't any rules here! If you do add color, be sure to set the colors with your iron. A good idea is to place a piece of tissue paper on top of the image while ironing and don't slide the iron around as this can smudge the ink. Once the images are dry, distress with distressing ink if desired. I desired, so I did.
PlacementSeparate each image by cutting them out of the fabric. Place each image onto your silk front cover rectangle. Determine the best placement.
Note that the silk rectangle is resting on top of the outside fabric. I frequently check on placement and size before actually sewing things together. I know, maybe if I measured better, I wouldn't have to do this so often. Once you are happy with placement, sew each image to the rectangle.
EmbellishmentsNow it's time to embellish your silk-like rectangle even more. I kept it fairly simple and decided to adhere a fabric flower and button to the top and then stamped "My Story My Life" with alphabet stamps.
I used a scrap of the outside fabric to make the flower and then just sewed a button into the middle of it. Next, just sew the button onto the rectangle. Easy peasy.
Secure Rectangle, Sew Hems and Finish Now, secure your rectangle to the outside cover fabric. Using your book as a guide, double and triple check your placement before sewing.
Now measure (or eyeball) again, iron and then sew a double hem on the top and bottom of the outside fabric.
Now for the moment of truth...sew your double hem on the inside flap and then sew the flaps down. These are the "pockets" that hold the book cover and back.
Voila! Your own super cute...and personalized...Journal Jacket!
I hope you liked this tutorial. If you have any questions..or I failed to be clear on something, please do not hesitate to email me! If you decide to sew one of your own, please let me know! I'd love to see them!
Thanks so much to JoAnne for asking me to write a tutorial for her Tutorial Tuesday! I am very humbled to be a part of her lovely blog and am forever grateful for her invitation.
Toodles!
Angela

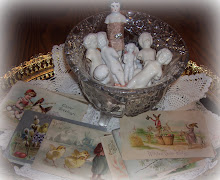
 I covered them in burlap and embellished with vintage seam binding and shabby flowers with vintage pearl centers....
 and stuffed each one...
  with all the vintage flea market finds they would hold!


TABBYSPLACE.png)